Sheet Pan Vegetables That Actually Brown
Learn to stagger a tray of carrots, broccoli, and chickpeas so each finishes at the right moment, then turn the result into dinner.
8 min read
A tray of vegetables can come out of the oven with beautiful edges and still taste disappointing. The broccoli is crisp but the carrot coins have hard centers. The chickpeas look dry yet feel pasty. Somebody adds lemon to brighten the dish, and the liquid gathers under the vegetables instead of coating them. These problems are related. They all come from treating the tray as a single ingredient with a single cooking time. A better tray is a small schedule. It has an early shift for dense vegetables, a late shift for delicate edges, and a final minute at the counter for anything wet or fresh.
This version pairs carrots with broccoli and canned chickpeas, then adds lemon and tahini at the table. The carrots are cut to a predictable thickness, the broccoli goes in later, and the chickpeas occupy a dry corner of their own. You can follow the method with a regular rimmed metal sheet. The chief tools are space and attention, and the most useful measurement is how much bare metal you can still see once the vegetables are spread out.
What goes on the tray
For three generous servings, use about a pound of carrots, a medium head of broccoli, and one fifteen-ounce can of chickpeas. Have olive oil, fine salt, black pepper, one lemon, and three tablespoons of tahini ready. A small garlic clove and a handful of parsley are welcome if you have them. For a fuller meal, serve the vegetables with warm bread or a cooked grain. The amount of oil depends on the surface of the vegetables, so measure out three tablespoons and use most of it for tossing rather than pouring it all into the pan.
A big broccoli head may look like it will feed a crowd because the top occupies so much space. Weigh it if you want a precise shopping list, but judge the amount for the pan after trimming and cutting. The stalk is edible and useful. Slice away the tough skin, then cut the inner stalk into thin slabs so it can go in with the carrots. Keep the flower buds for the second stage. Dense stalk and loose florets came from the same plant, but their structure makes them behave like different vegetables in the oven.
Give the carrots a head start
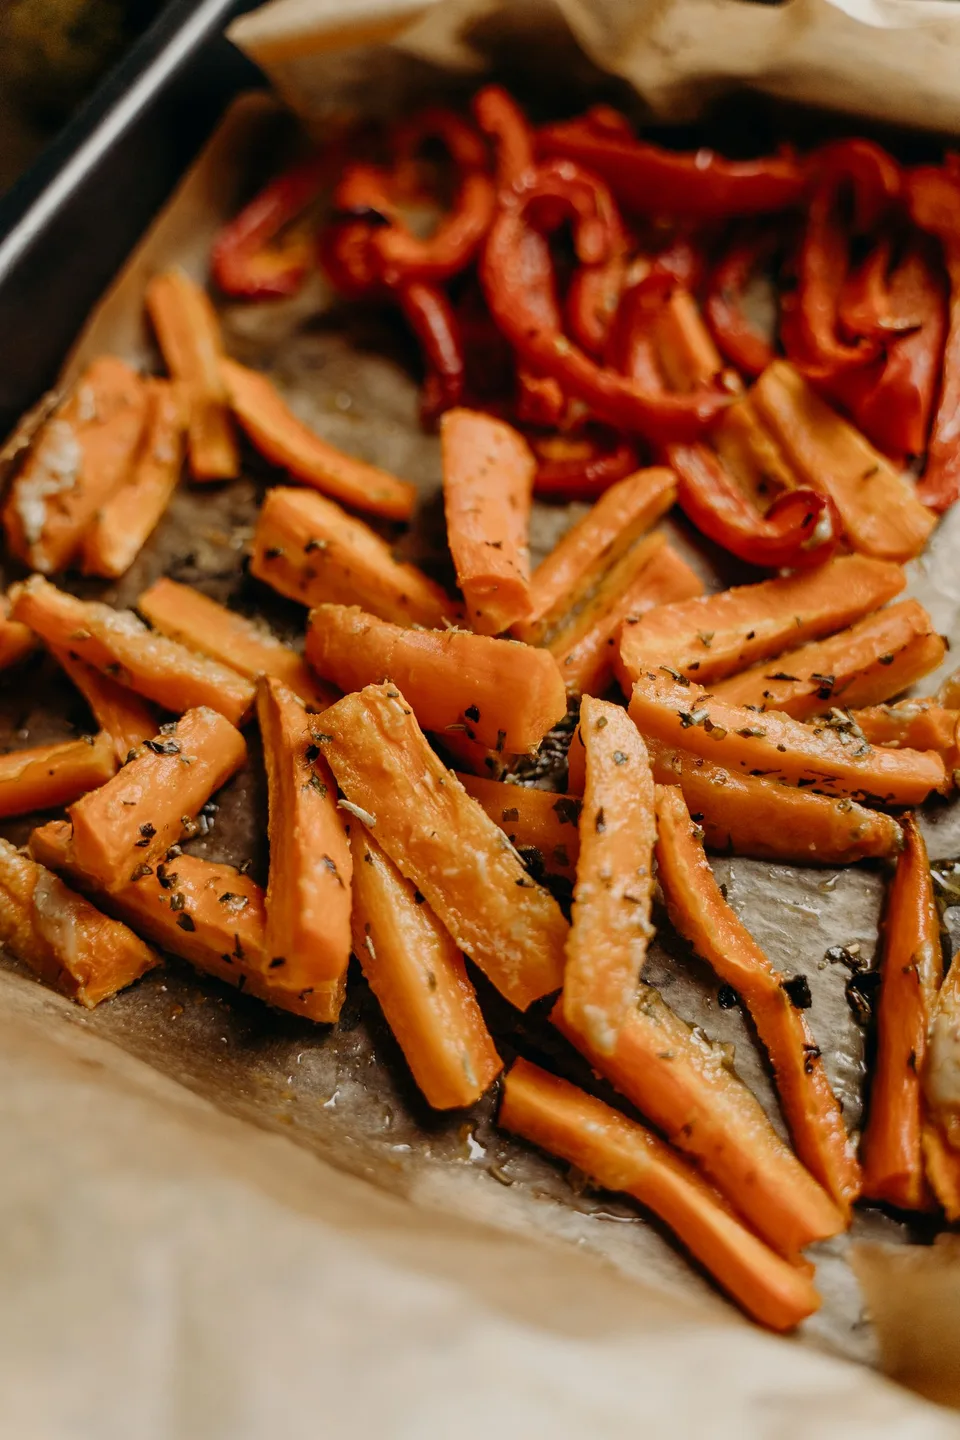
Heat the oven to 425°F or 220°C, with a rack in the middle. Scrub the carrots and cut them lengthwise if they are thick. Cut again on a slant into pieces about half an inch thick. A slanted cut gives you a broad face that can sit on the pan. The pieces can be different lengths as long as they are similar in thickness. A small skinny tip can stay whole. Slice a fat shoulder in half before making your cuts so you do not end up with a raw center beside several finished pieces.
Toss the carrots and broccoli stalk with enough oil to make them lightly glossy, then season with a pinch or two of salt. Put them on one half of the pan. Turn several of the broad cut faces down. Leave a gap between neighboring pieces, which allows moisture to move away instead of collecting beneath a crowded pile. Start checking at around twelve minutes. You want faint color on the contact side and enough softening that a thin knife begins to enter with only moderate pressure. If your carrots are particularly thick, give them another few minutes before moving on.
Dry the chickpeas and split the florets
Meanwhile, drain the chickpeas, rinse them, and shake away the water. Roll them in a clean towel or blot them with paper towels. Some loose skins will come off. Discard those that lift freely, then stop. Taking every skin off is tedious and the tray works perfectly well with most still attached. Drying the outside matters because water sitting on the surface has to evaporate before the chickpeas begin to color.
Cut the broccoli into medium florets with a flat surface. Slice down through the thick stem and pull the branches apart with your fingers when you get near the flower buds. This reduces the pile of crumbs on the board. Toss with oil and salt, using your hands to distribute a thin film to both stems and buds. Keep loose crumbs off the tray unless you intend to pull them out early. They can become bitter long before the rest of the florets are ready.
Remove the hot pan, rest it on a heatproof surface, and slide the broccoli and chickpeas into the open area. Set the broccoli cut side down where you can. Give the chickpeas a patch near an edge so they are easy to move independently. If everything touches, get a second pan or reserve some florets for another meal. A full half sheet with visible gaps is a good target. One overcrowded pan may finish without the texture that makes this dinner worth its time.
Look underneath before shaking
Return the tray to the oven and check after about ten minutes. Lift a floret and a carrot with a thin spatula. The color where they meet the pan will usually tell you more than a quick glance through the oven door. If the carrots are dark in one spot and pale everywhere else, rotate the pan and move the nearly finished pieces inward. Check the chickpeas by tasting one after it cools briefly. They are ready when the exterior feels firmer and the center still has a creamy bite. They do not have to become hard snacks.
Give the tray a few more minutes if the broccoli is still bright with no toasted edges or the carrots resist a knife. If a few smaller pieces finish early, lift them onto your serving plate and put the tray back. There is little benefit to waiting for the entire pan to match. The tallest florets may take longer than the flat ones, and individual carrots from the same bag can vary. Taste from the middle and the edge of the pan before you call the whole thing finished.
Make the sauce at the counter
Stir three tablespoons of tahini with one tablespoon of lemon juice, a small pinch of salt, and a little grated garlic if using. It will probably stiffen at first. Add cool water one tablespoon at a time, stirring after each spoonful, until it flows easily from the back of a spoon. Taste it with a carrot from the pan. If it seems flat with the vegetable, add a squeeze more lemon or a pinch of salt. If it already tastes sharp on its own, try another drop of water or a small spoonful of tahini before making a larger adjustment.
You can spoon the sauce onto plates and arrange the vegetables on top, or bring it to the table separately. Both approaches preserve more of the toasted texture than tossing everything in sauce while it is still hot. A final scatter of parsley is useful because its fresh flavor lands differently from the warmed spices in a roasted dish. A little freshly ground pepper over the chickpeas is enough. The lemon can also come to the table in wedges for people who prefer more acidity.
Make it work with a different market basket
If your carrots are small and sweet, roast them whole after splitting the thickest ones lengthwise. If you have parsnips, cut them into short batons and check the thinner tips first, since they tend to darken quickly. Cauliflower can take the place of the broccoli. Cut the florets so each has a broad side and start checking a few minutes later than you would for broccoli. Dense winter squash makes a useful first-stage vegetable, provided the pieces are cut about the same thickness. Peeling and cutting a whole squash may be a bigger job than you want on a weeknight, so pre-cut squash is a reasonable choice.
Fresh herbs, greens, and juicy vegetables belong elsewhere in the schedule. Chopped tomatoes on the tray will release liquid, but a handful of halved cherry tomatoes can dress individual plates when the vegetables come out. Tender spinach can go beneath the hot vegetables, where it will wilt slightly without affecting browning. Pita, grain, or a spoonful of plain yogurt works well under the pile if you prefer a softer base. Build a plate with enough of one element to catch the tahini rather than piling every option together.
Troubleshooting the next tray
When the pan looks wet at the ten-minute check, move the chickpeas and half the broccoli onto a second sheet if you have one. Give the first pan a little more time and resist the urge to add extra oil. Oil helps contact once the surface is dry. More oil around a puddle of vegetable liquid will mainly make the finished tray feel greasy. If your broiler is the only way to add color near the end, check constantly and take any small pieces out first. The hot top element can turn a floret from brown to charred while you are stirring sauce.
There is also a difference between brown vegetables and overcooked vegetables. If the carrots taste good and the broccoli is already soft, you can live with lighter color and serve. A second attempt at the same dinner will teach you more if you change one thing. Give the pan more room, start the carrots a little earlier, or cut the broccoli larger. Make a note of the adjustment on the recipe if it works. Oven schedules make sense only after you know how much food your sheet holds and where your oven runs hot.
Any leftovers can become a warm lunch with rice, a sandwich filling with tahini, or a side for a soup. Refrigerate the vegetables promptly in a shallow container. Warm them in a skillet or oven if you want to bring back some surface texture, or eat them cool with extra lemon. Keep the sauce separate until serving. At lunch, as at dinner, a spoonful of dressing has more effect when it meets the vegetables just before the first bite.